English
Low-Quality PET Preform Problems: Common Defects & Fixes
Content
A cracked bottle neck on a filling line. A hazy beverage container rejected at the retail shelf. A batch of preforms that simply won't blow into uniform shapes. In most of these cases, the root cause isn't the blowing machine, the mold, or the operator — it's the preform. The quality of a PET preform determines everything that follows. Once a flawed preform enters your production line, no amount of parameter adjustment downstream can fully recover it.
This article breaks down the most common defects that stem from low-quality preforms, explains where each one originates, and gives you clear corrective actions — whether you're troubleshooting an existing problem or trying to prevent one before it starts.
Why Preform Quality Sets the Ceiling for Bottle Performance
PET preforms are the intermediate form between raw resin and finished bottles. Every dimension, wall thickness, neck finish, and material property of the preform is carried — and amplified — into the final bottle during the blow molding process. A preform with uneven wall distribution doesn't become a uniform bottle after blowing; the variance gets stretched wider. A preform with internal stress doesn't relax during blowing; it fails at the weakest point.
This is why sourcing preforms from a manufacturer with rigorous quality control isn't just a procurement preference — it's a production risk decision. Poor preform quality typically shows up in three zones: the raw material and its handling, the injection molding process, and the mold tooling itself. Problems in any of these areas produce recognizable, predictable defects.
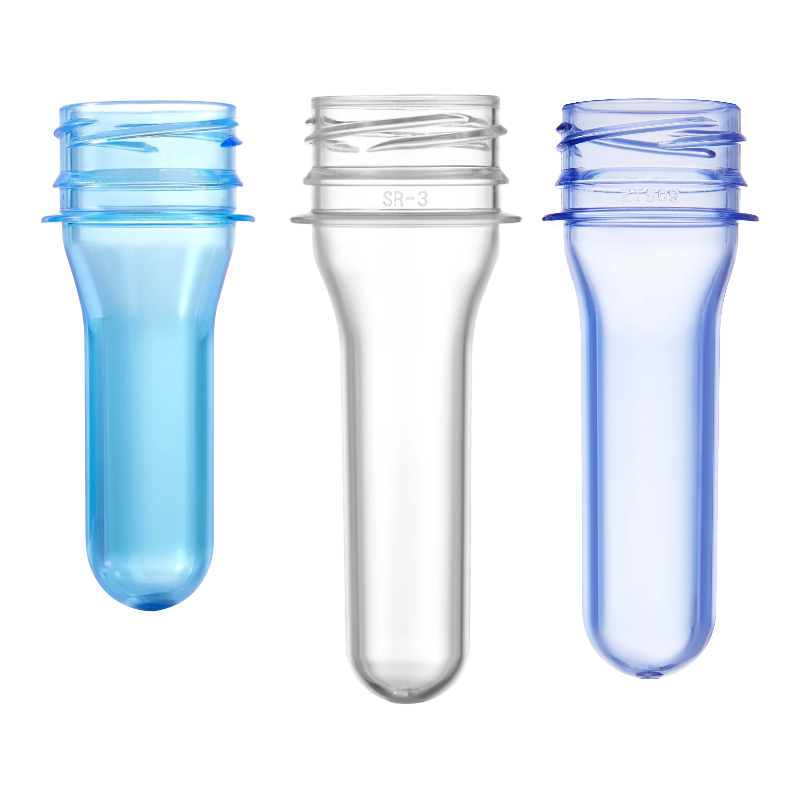
7 Common Defects from Low-Quality Preforms
1. Black Specks
What it looks like: Small dark particles embedded in or on the surface of the preform, often visible in clear or light-colored preforms.
Root causes: Resin degradation from excessive barrel residence time; contamination from prior production runs left in the screw or hot runner; carbon deposits from overheated zones; use of improperly purged recycled or regrind material.
Fix: Enforce strict purging protocols between material changeovers. Reduce barrel temperatures in zones prone to overheating. Audit regrind inclusion rates — using too much recycled material without quality screening introduces contamination risk. In food and beverage applications, any batch showing black specks should be quarantined, as the visual defect is also a contamination red flag for regulatory compliance.
For a broader look at injection molding defects and their root causes, including how contamination enters the production stream, see our detailed guide.
2. Bubbles and Internal Voids
What it looks like: Small air pockets or voids inside the preform wall, sometimes visible as cloudy clusters, sometimes only detectable under polarized light.
Root causes: Insufficient resin drying before processing. PET is hygroscopic — it absorbs moisture from ambient air. If moisture content exceeds 0.005% before entering the injection barrel, hydrolysis occurs during melting, releasing gas that forms bubbles. Trapped air from inadequate venting can also cause voids.
Fix: Dry PET resin at 160–180°C for a minimum of 4–6 hours using a dehumidifying dryer, not just a hot-air dryer. Monitor dew point at the dryer outlet. Inspect and clean mold vents regularly. Understanding how PET resin is processed for preform manufacturing — including drying requirements — is fundamental to eliminating this defect class.
3. Yellowing or Discoloration
What it looks like: Preforms appear yellowish, amber-tinted, or brownish instead of clear. Sometimes only detectable when comparing against a reference standard.
Root causes: Thermal degradation from excessive melt temperature or prolonged residence time in the barrel. Acetaldehyde generation, a byproduct of PET degradation, both discolors the preform and produces an off-taste that migrates into beverages. Low-grade resin with unstable IV (intrinsic viscosity) is also a common culprit.
Fix: Use virgin-grade PET resin with IV values appropriate for your application (typically 0.72–0.84 dL/g for standard bottles). Reduce melt temperature to the minimum required for good flow. Minimize screw back-pressure. Avoid long idle periods with material in the barrel. If yellowing persists, have the resin batch tested for IV degradation.
4. Short Shots (Incomplete Fill)
What it looks like: Preforms that are incompletely formed — missing material in thin areas, with underfilled tips or gate regions.
Root causes: Insufficient injection pressure or shot volume; blocked or restricted hot runner nozzles; incorrect melt temperature causing poor flow; venting issues in the mold cavity.
Fix: Check injection pressure settings against material and mold requirements. Inspect hot runner tips for blockages or wear. Increase melt temperature in small increments while monitoring for discoloration. Our dedicated short shot troubleshooting guide walks through a systematic diagnostic process for this defect.
5. Flash at the Parting Line
What it looks like: Thin fins of excess plastic along the mold split line or at the gate. Can be a sharp edge or a visible seam running along the preform body.
Root causes: Worn or misaligned mold halves; excessive injection pressure; insufficient clamping force; mold surface damage that prevents a tight shut-off.
Fix: Inspect the parting line surfaces for wear or damage and have them re-machined if necessary. Verify clamping force is sufficient for the projected area of the mold. Reduce injection speed and pressure at fill completion. Flash from a chronic low-quality supplier often indicates molds that are beyond their service life — this is a tooling investment issue, not just a process issue.
6. Uneven Wall Thickness
What it looks like: When cut cross-sectionally, the preform wall varies significantly from one side to the other. In the blown bottle, this manifests as uneven stretch, weak panels, or structural failure under pressure.
Root causes: Core shift in the mold due to wear or improper assembly; non-uniform cooling; inconsistent injection speed causing uneven filling; poor mold concentricity.
Fix: Measure wall thickness at multiple points using ultrasonic thickness gauges. If core shift is confirmed, the mold requires realignment or mechanical repair. Optimize cooling channels to deliver uniform temperature across all cavities. This defect is particularly damaging in carbonated drink applications where even slight wall variation can lead to burst failures under pressure.
7. Crystallinity Defects (Haze and Pearlescence)
What it looks like: White or opaque patches — sometimes across the body, sometimes concentrated at the base or shoulder of the preform. The material has partially crystallized when it should have remained amorphous.
Root causes: Insufficient or uneven cooling after injection — if the preform cools too slowly, PET crystallizes instead of solidifying in its clear amorphous state. Excessive resin drying temperature can also initiate pre-crystallization. Neck crystallinity, by contrast, is intentionally induced for structural purposes — but uncontrolled crystallization in the body is a defect.
Fix: Ensure cooling channels are clean, unblocked, and delivering water at the correct temperature and flow rate. Reduce drying temperature if pre-crystallization is suspected. Use a chiller system adequate to the machine's cycle rate — underpowered cooling is a common hidden cause. Check that preforms are fully ejected and cooled before stacking to prevent heat buildup.
The Hidden Costs Beyond Visible Defects
Visible defects — the black specks, the hazy patches, the flashed edges — are only the part of the problem you can see. The more damaging costs are often invisible until they compound. A single defective preform batch can trigger a cascade: production stoppage to diagnose the problem, rework or disposal of affected inventory, delay in customer shipment, potential breach of supply agreement terms, and in food or pharmaceutical applications, a formal quality hold that requires regulatory documentation.
There's also the downstream failure mode that's easy to overlook: a preform with marginal quality that passes visual inspection but fails during blow molding. Uneven walls that blow into structural weak points. Residual stress that causes neck cracks under capping torque. These failures don't show up at the preform stage — they show up at the highest-cost stage of your production process. Understanding why bottles deform after filling often points directly back to preform quality as the originating cause.
The economic logic is straightforward: preforms are the lowest-cost point at which quality problems can be caught. Rejecting a defective preform costs fractions of a cent. Scrapping a defective filled bottle costs the bottle, the cap, the label, the filling time, and the product inside it.
How to Identify a Quality Issue Before It Reaches Your Line
A structured incoming inspection protocol catches most preform quality issues at the dock, not on the filling line. Here are the checks that matter most:
- Visual inspection under controlled lighting: Check for black specks, yellowing, haze, and surface defects across a statistically representative sample from each cavity position. Using polarized light panels significantly improves detection of internal stress and crystallinity issues.
- Dimensional verification: Neck finish dimensions (thread profile, ovality, sealing surface) are the most critical. Use go/no-go gauges and digital calipers. Neck finish errors can't be corrected downstream and will cause capping failures.
- Weight measurement: Preform weight is the fastest proxy for consistent shot volume. Weigh a sample from each cavity and compare against the nominal spec. Variance beyond ±0.3g in a standard preform typically indicates a process or tooling issue.
- Wall thickness spot check: Ultrasonic thickness measurement at the body, shoulder, and gate region. Any asymmetry exceeding your spec tolerance should trigger a supplier hold.
- Acetaldehyde content: For beverage applications — especially still water and sensitive products — AA content in preforms directly affects product taste. Request supplier COA data or conduct periodic third-party testing.
Review key factors to evaluate before ordering PET preforms for a complete pre-purchase checklist covering specs, tolerances, and supplier qualification criteria.
What to Look for in a Reliable Preform Supplier
Not all preform suppliers operate at the same standard, and the gap between them is often invisible until production pressure exposes it. When evaluating a supplier, the most reliable indicators of consistent quality are process transparency and tooling investment — not just price per unit.
Look for suppliers who can provide cavity-specific quality data, not just batch-level averages. A supplier running a 72-cavity or 96-cavity mold without per-cavity monitoring can ship a batch where 80% of cavities are fine and 20% are producing marginal product — and the batch average will look acceptable. Per-cavity weight and dimension data separates systematic quality management from batch sampling theater.
Also evaluate resin sourcing and traceability. Virgin-grade PET from verified suppliers with documented IV ranges is the foundation of consistent preform properties. A supplier who cannot tell you the source and specifications of their resin is accepting unknown variability into every batch they produce.
Finally, consider mold age and maintenance records. Tooling that exceeds its intended shot count without refurbishment produces progressively worse parting line flash, dimensional drift, and surface quality degradation. A supplier with documented mold maintenance schedules and cavity refurbishment logs is one that takes long-term quality seriously.
Explore our full PET preform product range — manufactured under strict quality control with traceability from resin to finished preform — and contact our team to discuss specifications for your application.